|
Building codes generally allow homeowners to install a second layer of
asphalt shingles over an existing layer of old shingles. However, for a
more secure roof during hurricanes and other high winds or in high hail
areas, it is strongly recommended that you remove the old shingles before
installing the new ones. Besides giving you more confidence that the
shingles will seal properly (wind rated shingles have only been tested as
applied over a flat roof deck; not over the bumpy surface of an existing
layer of shingles) and that you will have a more wind resistant roof
covering, it gives you the opportunity to take several additional steps
(replacing damaged or decayed sheathing, re-nailing your roof sheathing
to increase its resistance to being lifted off in a hurricane, adding
secondary water protection as outlined below, and applying a high quality
underlayment) to make your house safer; all at relatively little extra cost.
The basic steps required to achieve a safer, more wind resistant roof deck are:
- Remove the old shingles and underlying building paper to expose
the roof deck.
- Inspect the roof deck to determine if parts of it are rotted,
delaminated, warped or structurally unsound. If so, replace these
sections with similar materials of the same thickness.
- Check the nailing of the roof deck to the rafters or trusses that
support the deck. For wood plank decks, the existing nailing has
generally proven to be adequate (If at least two nails were installed
every time one of the planks crossed a rafter or truss) so you should
not need to re-nail the deck. For wood panel sheathing (plywood or
Oriented Strand Board, OSB) nail sizes and nail spacing commonly used,
particularly along trusses and rafters in the middle of the panels
have been inadequate to provide the needed resistance to uplift in
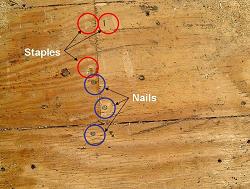
hurricanes. Staples have been found by both engineering testing and
hurricane experience to not hold roof sheathing down very well,
regardless of how close together they may be.
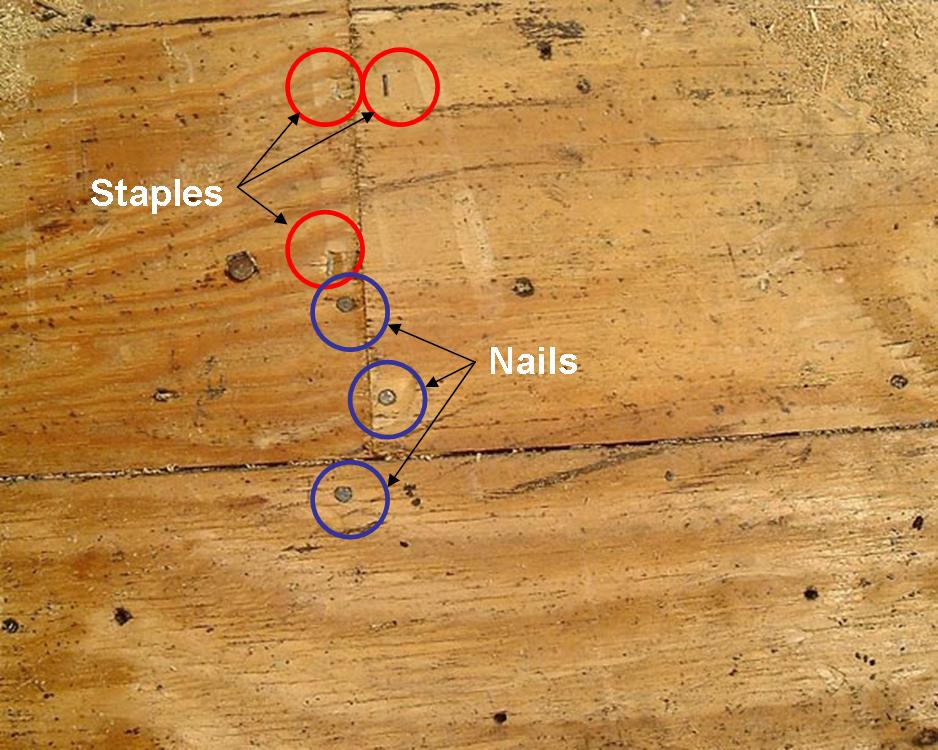
|
Nails and staples as seen from top of roof sheathing.
The plywood was probably initially nailed in place in the
corners and edges and then staples were added.
(click image for larger version) |
- Check every single sheet of plywood or OSB. Sometimes during
construction sheathing does not get completely nailed down as intended.
Sometimes the carpenters forgot to nail down the sheathing completely
because they got distracted or were in too big of a hurry. And,
sometimes the sheathing does not get nailed down adequately because
the building code standards for the nailing were less stringent at the
time the sheathing was applied. In high wind situations, poorly
attached sheathing that will come off first, and it only takes one
failure to have a catastrophe. Bear in mind that that nails don't
cost much and if the roofer uses a pneumatic gun, the cost of adding
nails is simply not great and is certainly small in relation to the
benefit. In Florida, the existing building code (FEBC) requires that
roof sheathing be fastened to today's standards before replacement
shingles are applied.

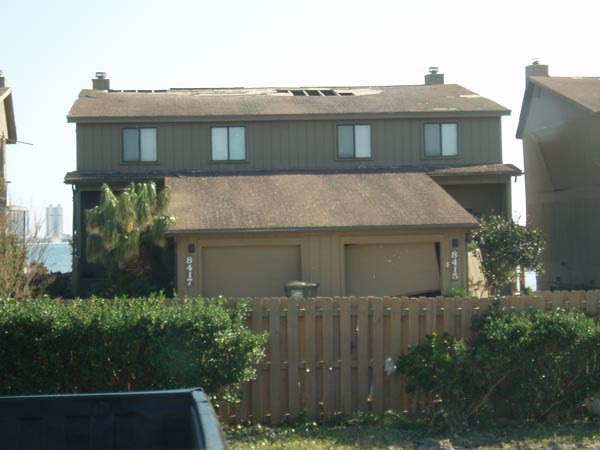
|
Missing panels from the middle of roof
indicates poor nailing of sheathing.
(click image for larger version) |
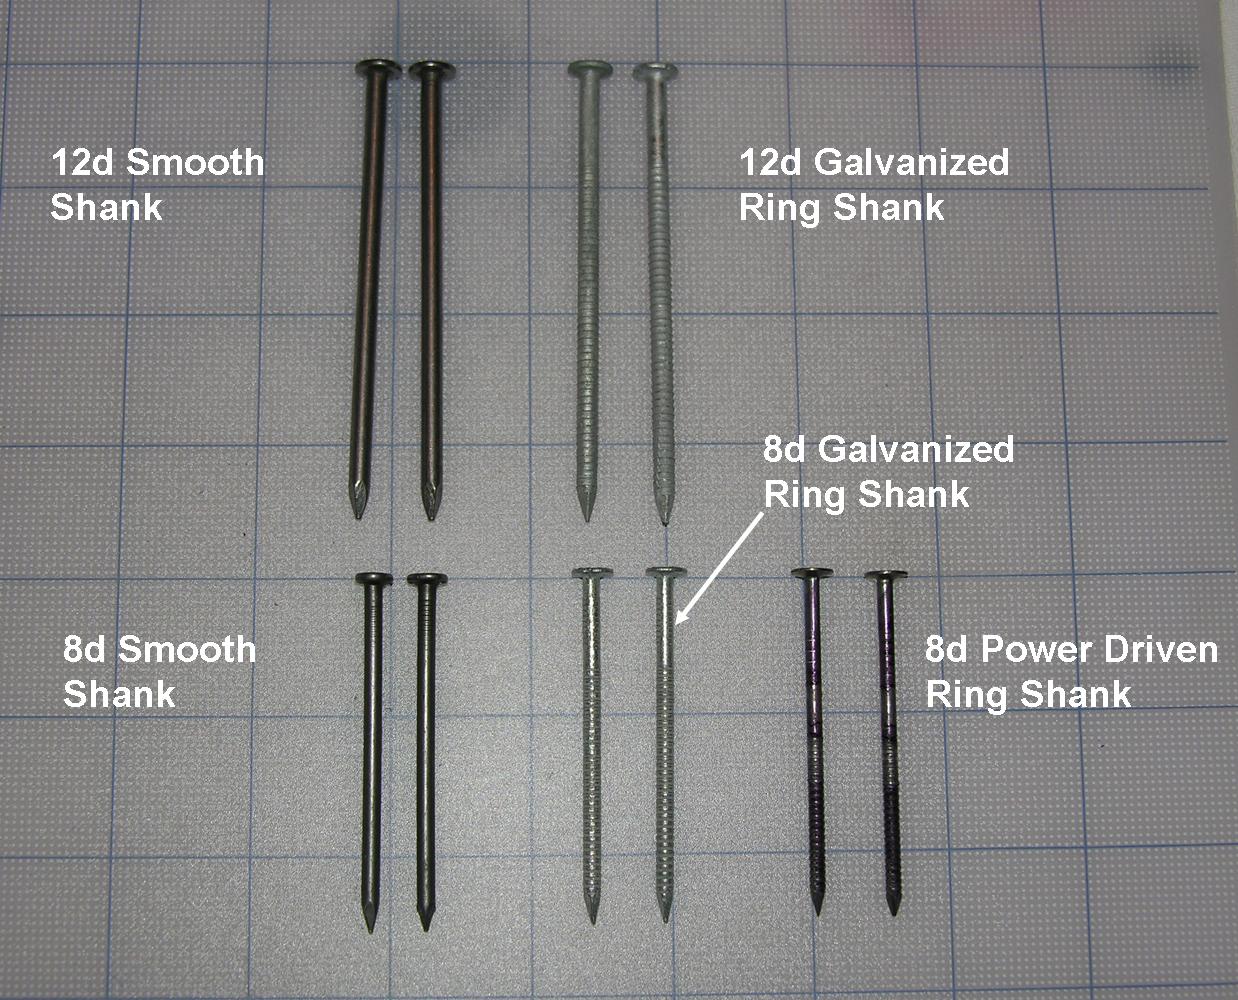
- The ideal situation would be to find that you already have 8d
(2-3/8" or longer) ring shank nails spaced no farther apart than 6"
along the 4' edges of the sheathing as well as along the rafters or
trusses in the center portion of the sheathing. Ring shank nails have
rings around the shank that make the nails harder to pull out than the
more typical smooth shank nails with which you are probably familiar.
Unfortunately, it is unlikely that you will find this ideal situation
unless your house was recently built to high wind standards. Building
code minimum nailing patterns for most of the hurricane prone areas are
8d (2-1/2" long) smooth shank nails spaced every 6" along all roof
framing members. This should be the minimum you accept. However, we
strongly recommend the following nailing patterns to upgrade roof
sheathing connections:

|
Comparison of smooth shank and ring-shank nails
(click image for larger version) |
- Make sure that you have 8d smooth or ring shank nails spaced
a maximum of 6" along all 4' edges of the roof sheathing
- If the design wind speed for your area is less than 120 mph
add 8d ring-shank nails at 6" spacing along all the intermediate
roof structure members within 4' of the edges and ridges of the
roof. Add 8d ring shank nails so that the maximum spacing between
existing and added nails is 6" along intermediate roof framing
members in all areas inside the 4' perimeter.
- If your design wind speed is greater than 120 mph, add 8d
ring-shank nails at 6" spacing along all the intermediate framing
members across the whole roof.
- If you find staples, no matter what the spacing, you should add
8d ring-shank nails at 6" spacing along all framing members (along
the edges of the sheathing and along intermediate framing members).
- If you find 6d (2" long and smaller diameter than 8d), no
matter what the spacing, you should add 8d ring-shank nails at 6"
spacing along all framing members (along the edges of the sheathing
and along intermediate framing members).
|
What you would like to have holding your roof
sheathing down when a hurricane strikes
(click image for larger version) |
Additional guidance on roof deck sheathing attachment, that is written more from
the perspective of building a new home, can be found in the FEMA coastal construction
manual and their recovery fact sheets (see
FEMA_hgcc_fact18_Roof_Sheathing_Installation.pdf).
This fact sheet also addresses the issues of gable overhang vulnerability and the
need for blocking along the edges of sheathing at ridge vents. In retrofit applications,
any desired blocking should be added before the roofer gets ready to re-roof. While
you should be able to get the roofer to re-nail the decking, including adding nails
along the edge of the ridge vent, it is extremely unlikely that the roofer would be
willing to install the blocking. The addition of blocking along the edges of the
ridge vent is most important for roofs with large gable ends (more than about 8-feet
tall) in locations where the design wind speeds are greater than about 130 mph.
Back to main roofing page
|